메인 플로우는 여기를 따라한다.https://github.com/facebookresearch/pytorch3d/blob/main/INSTALL.md

참고하여  pytorch3d 개발환경 설치


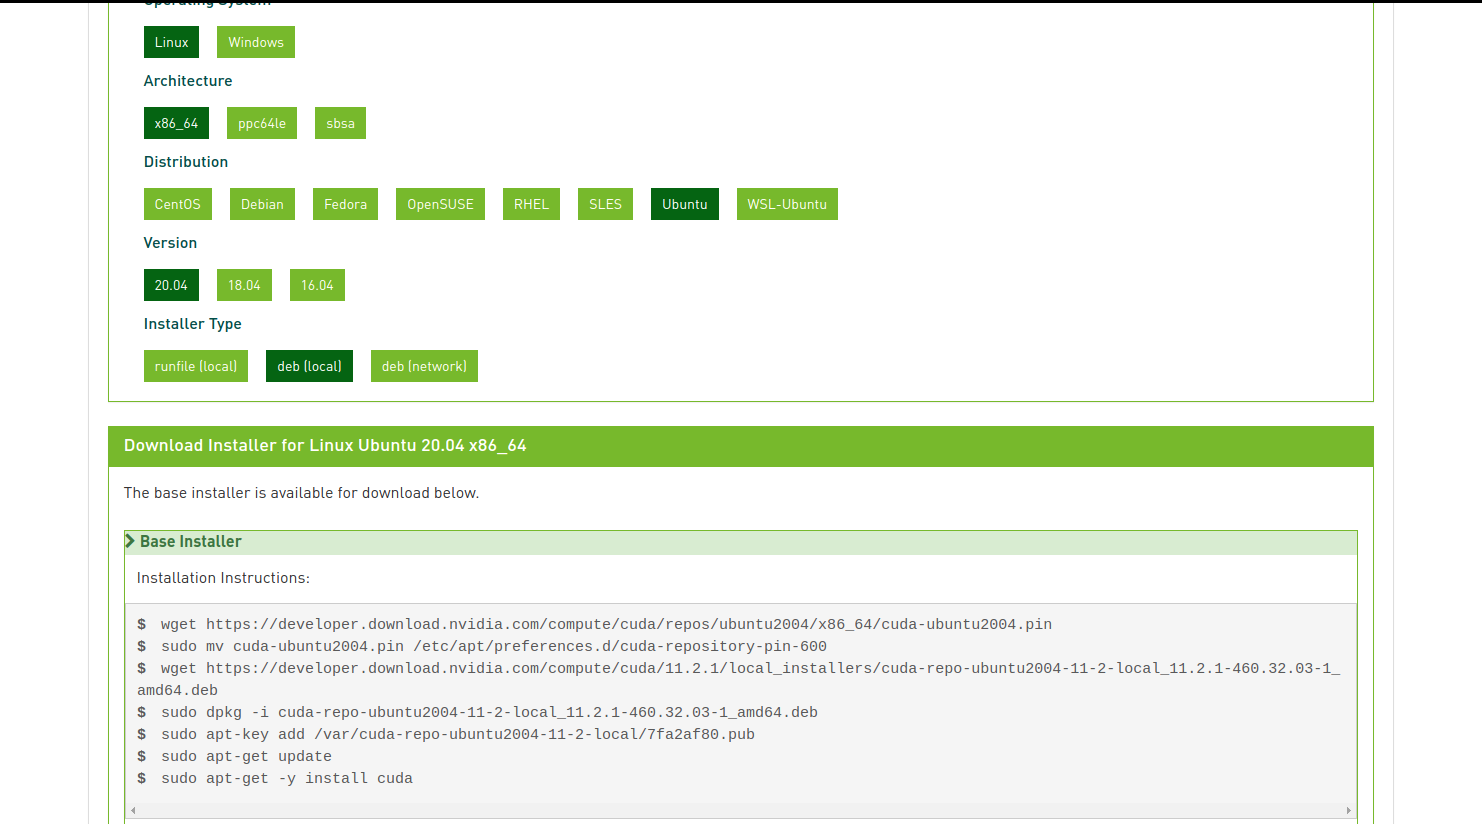
1. cuda(권장) : 11.7 설치
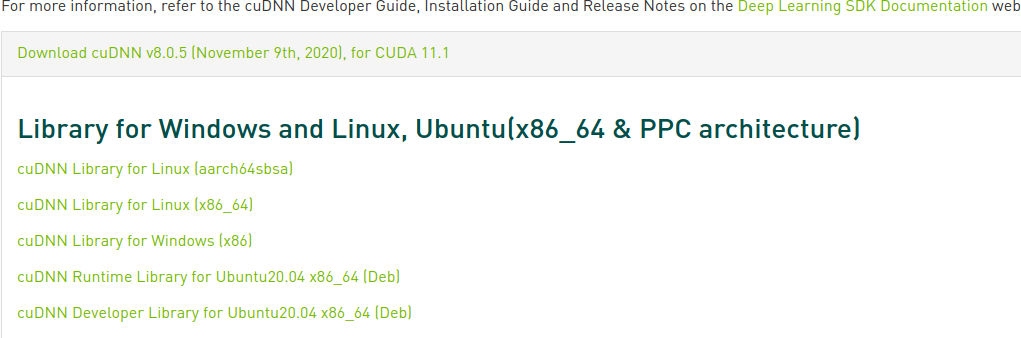
2. 11.7 에 맞는 cudnn lib 설치

3. pytorch 설치 (2.0.1) with cuda 11.7 torch 버전은 크게 영향은 없는듯

4. cub 환경 설치 
cuda\inculde\thrust\cuda\version.h 

에 맨 윗출을 추가해놓는다. (#define THRUST_IGNORE_CUB_VERSION_CHECK true)


cuda 11.7 의 경우 cub 11.5 를 포함시켜놓았는데, 이 cub 사용시 pytorch3d 빌드시 문제가된다.

#define THRUST_IGNORE_CUB_VERSION_CHECK true
#ifndef THRUST_IGNORE_CUB_VERSION_CHECK

#include <thrust/version.h>
#if THRUST_VERSION != CUB_VERSION
#error The version of CUB in your include path is not compatible with this release of Thrust. CUB is now included in the CUDA Toolkit, so you no longer need to use your own checkout of CUB. Define THRUST_IGNORE_CUB_VERSION_CHECK to ignore this.
#endif

// Make sure the CUB namespace has been declared using the modern macros:
CUB_NAMESPACE_BEGIN
CUB_NAMESPACE_END


5.내장된 cub 11.5 를 11.7로 바꾸는 작업을 할것이다. 

방법은 2가지가 있는데, cuda 설치경로에 cub 11.7 을 덮어씌우는 방법과 cub_home 환경변수 등록후

directory 로 빌드시 포함시키는방법

cub 는 아래서 다운받는다.

https://github.com/NVIDIA/cub/releases


Releases · NVIDIA/cub

Cooperative primitives for CUDA C++. Contribute to NVIDIA/cub development by creating an account on GitHub.

github.com


C:\Program Files\NVIDIA GPU Computing Toolkit\CUDA\v11.7\include\cub

로들어가 기존 cub 파일들 빽업시켜놓고 11.7로 바꿔치기 하였다.


6.

git clone https://github.com/facebookresearch/pytorch3d.git
cd pytorch3d && pip install -e .

를 이용하여 build 성공!


conda 를 이용해서 개발환경 잘 저장해놓자!


7. pytorch 3d 를 이용하여 간단한 gif 생성


1. www.nvidia.com/

에서 os 등 선택 후 드라이버 검색 > 결과 460.32 /  455.45

460.32 = cuda 11.2

455.45 = cuda 11.1 을 포함하고있음

455.45 를 선택하여 설치 함

일단 여기까지 성공


1-2. cuda tool kiㅅ  설치  nvidia 드라이버와 맞는 cuda 를 설치

developer.nvidia.com/cuda-downloads?target_os=Linux


CUDA Toolkit 11.2 Update 1 Downloads

Select Target Platform Click on the green buttons that describe your target platform. Only supported platforms will be shown. By downloading and using the software, you agree to fully comply with the terms and conditions of the CUDA EULA. Operating System

developer.nvidia.com

아래 명령어등을 이용하여 환경변수등록 필요!

echo 'export PATH=$PATH:/usr/local/cuda-11.2/bin' >> ~/.bash_profile
echo 'export LD_LIBRARY_PATH=$LD_LIBRARY_PATH:/usr/local/cuda-11.2/lib64' >> ~/.bash_profile
echo 'export CUDADIR=/usr/local/cuda-11.2/' >> ~/.bash_profile


2. cudnn 설치

developer.nvidia.com/rdp/cudnn-download

마찬가지로 위링크 통해 cudnn 설치 


일단 이렇게 많이 뜨는데, Runtime library 로 설치  함//


3. 가상환경설정 virtualenv + pip 조합으로 설정

pycharm 을통해 default viertualenv 를 만들고

source /home/sangil/PycharmProjects/PatchNet/t171/bin/activate

을통해 activate


4.tf2 , torch 등을 설치


pip install 쭉 복사해다가 붙여주면됩니다.

설치완료후 


아래 코드를 통해  동작확인 하고 끝!

In [1]: import torch

In [2]: torch.cuda.current_device()
Out[2]: 0

In [3]: torch.cuda.device(0)
Out[3]: <torch.cuda.device at 0x7efce0b03be0>

In [4]: torch.cuda.device_count()
Out[4]: 1

In [5]: torch.cuda.get_device_name(0)
Out[5]: 'GeForce GTX 950M'

In [6]: torch.cuda.is_available()
Out[6]: True


4-2. <Tensorflow2 설치>

tf2 를 설치 해보자

tf2 설치는 간소화되어있다. 

pip install tensorflow 

오마이갓 여기 리스트 에 확인된바로는

tensorflow-2.1.0 2.7, 3.5-3.7 GCC 7.3.1 Bazel 0.27.1 7.6 10.1

이게 마지막 버전이라 TF 설치하기위해선 다운그레이드 해야할판이다 ㅎㅎ

tf2 를사용하려면 1번부터 다시 해서 10.1 cuda 에 맞춰서 설치하면 된다.

www.tensorflow.org/install/source#gpu


소스에서 빌드  |  TensorFlow

소스에서 TensorFlow pip 패키지를 빌드하고 Ubuntu Linux 및 macOS에 설치합니다. 명령어는 다른 시스템에도 적용될 수 있지만, Ubuntu 및 macOS용으로만 테스트되었으며 지원됩니다. 참고: 잘 테스트되고

www.tensorflow.org


*solutions for 4-2 

결론적으로 rtx3080 이 cuda 11.1 부터 호환되므로 위의 버전지원등의이유로 tf2 를 깔수 없지만 

이글을 참고해보면

stackoverflow.com/questions/63978039/is-cuda-11-with-rtx-3080-support-tensorflow-and-keras

1. TF 공식홈페이지엔 직접 cuda 버전을 맞추어서 tf 를 빌드에서 쓰라고한다.


2. 혹은 docker 를사용하여 빌드하면 된다고한다.

hub.docker.com/r/tensorflow/tensorflow/tags/?page=1&ordering=last_updated&name=2.4


Docker Hub


hub.docker.com

pip install tensorflow==2.4.1  버전으로 tf 및 Keras 설치 및 실행  성공 , 다만

cuda 버전이 TF 와 정확히 맞지 않아 memory 관련 warning 이 많이 뜬다.


그게 껄끄럽다면 아래 개발자버전을 이용하여 설치하면 3080 과 잘 호환되는 것을 알 수 있다.

혹은 tf : pip install tf-nightly==2.5.0.dev20210110

을이용하여 tf-nightly 를 이용해도 되는데 nightly 자체가 버그가 많은것으로 알고 있다.


+ Recent posts